Hiển thị các bài đăng có nhãn doll jewelry. Hiển thị tất cả bài đăng

Thứ Sáu, 6 tháng 1, 2017

It's a Cover-Up!!!


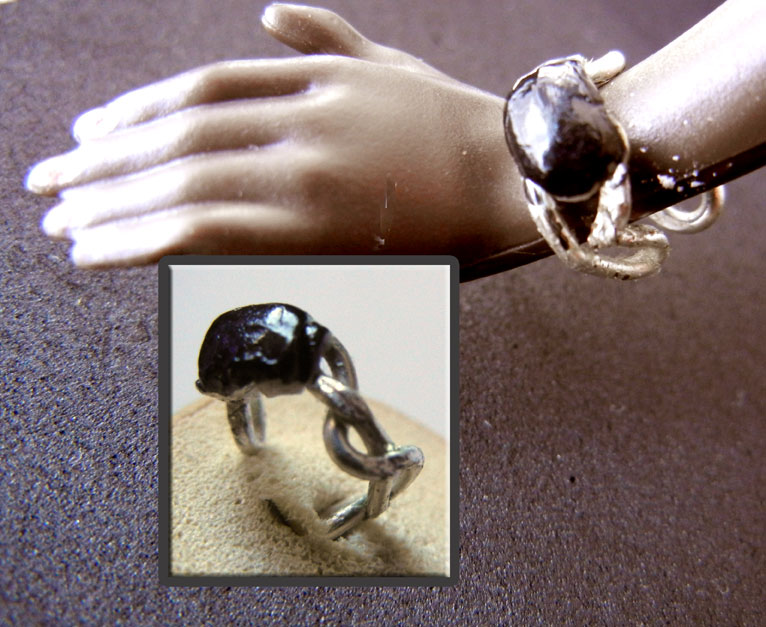
We've all been there. You find yourself in between doll purchases. You need a fix. You've blown your budget and you don't have much to spend. So you go to your local store to satisfy that "need" by buying a Barbie accessory pack. The problem is...the color, the style and the cheap plastic have all your dolls putting their fingers down their throats when you get home with the goods. But after you've removed that pair of shoes what to do with everything else? Use them as a base to make something better!
  
Inside of the Barbie accessory pack I recently purchased, was a necklace I almost liked. The Art Deco design was quite attractive but I imagined how much better it would look with leather inlays instead of silver-tone plastic.
 
1. I began by making a pattern so I wouldn't waste any of my precious leather scraps. I used a bit of paper tape which I put over each section then traced off to get a pattern.
2. Each pattern is then transferred onto a tiny scrap of leather and then the shapes are cut out. Set this aside.
3. First I wanted to prep the necklace with a coat of shiny silver in case it shows through.
4. Don't forget to paint the edges that are also likely to be seen


1. Now let's get started. Slather on the glue, section by section and lay on your leather squares onto the necklace.
2. I wanted a black and white necklace, so I put the black in the middle and the white on either side.
3. I felt it should have something else, so using 24 gauge silver jewelry wire, I wrapped the intersections of each color.
4. Using a pair of jewelry pliers, I pressed the wire in close to the necklace. Be careful not to press too hard or you'll break your necklace.
5. I continued to wrap the two sides of the necklace with this wire. Begin by placing a bit of the wire on the back side and wrap so as to cover this end. As you work, push the wire close together.
6. Again, I stop and press the wire together towards the necklace.
7. When you get to the neck, try to tuck the end underneath the other wire. However, if you are worried about the necklace scratching the doll, you can always put a bit of felt or leather on the underside.
8. And voila....Iman is wearing a REALLY nice necklace!!!
 

Very happy with the way that turned out, I found another necklace that had come with one of my SIS Barbies.
1. Here is the original necklace. Lots of possibilities for personalization! For this one, I didn't want the bling. Instead, I wanted to do something more discreet.
2. I start by applying glue to one stem of the necklace.
3. Using silky embroidery yarn, I put one end on the underside, then begin wrapping the yarn around to cover.
4. Keep wrapping tightly around the stem until you reach the end and dab a bit of glue underside and tuck the yarn underneath.
5. Repeat on the other side.


6. I rough cut a few rough cut strips of fabric.
7. Stitch them together at midpoint.
8. Cut a tiny circle of felt and glue to the medallion on the necklace.
9. Stich the base of it to the felt and readjust the strips.
 
This project really gets interesting when you personalize the Barbie handbags! I was given a lot of old Barbie accessories which included this very sweet, heart shaped (bubblegum pink plastic) purse.
1. With irregular shaped objects, the trick is to make a pattern so that you can better cut your material to fit.
2. I begin with a piece of tracing paper. I trace off the shape of the bag in the front.
3. Use a narrower piece of paper for the perimeter.
4. Make slits on both edge so that the paper will lay flat on the top. Trace off the edges.
5. Now place the paper around to check for fit.
6. Place the front pattern piece on the bag and then the sides to check for fit.
7. I used scraps of suede although you can use vinyl, felt or any other non-woven material. Lay your pattern on the material and cut out your pattern.
8. But we'll begin with the handle which I've decided to cover with a tiny strip of suede. You can use ribbon, embroidery yarn or simply paint it.
9. I lay down the edge of this strip then wrap the rest of it around it.
10. Wrap tightly right to the opposite edge.
11. Ad a dab of glue and fix to the inside of the purse.
 12. Now let's cover the outside. I begin by applying glue (I'm using rubber cement) to the sides of the purse.
13. Then carefully lay the side strip (remembering to cut the notches out on both edges to accommodate the handles) around the purse.
14. Next apply the glue to the side of the purse and carefully place the material over it. Repeat for the other side.
15. As for the top, you will be confronted as to how to deal with the part that shows.
16. Admittedly I thought a coat of paint would suffice. But alas, I wasn't completely happy with the results.
17. So I cut another small strip of suede to lay over the top and I'm much happier!
18. And here is the final result! I still have the sweet shape of the heart, but with the suede, it's a more sophisticated version my dolls just love!
 
Here's another handbag. This one has a relief and here's how I dealt with it.

 1. In the land of Barbie, bubblegum pink with cute little bows are all the thing. But my girls (even the playline Barbies) want something a little more sophisticated.
2. Using paper tape, I covered the handbag as a way of making a pattern. Cut notches around the base of the handles.
3. Here the is a bulge created by the knot of the bow. I let it poke through here. Then I trace around the edges of the handbag. Remove.
4. Apply another piece of tape on the side and trace the form.
5. Remove from the purse and place the front and the sides directly on the material. Here, I've chosen scraps of leather from an old belt.
6. Here is what my coverings look like
7. Apply glue to both the front and back of the bag and carefully put the leather onto the purse. Stretch it well and smooth out any gaps.
8. Be sure to press around the handles and at the top.

 9. Glue the sides, one at a time and carefully put the leather in place. For this bag, I've chosen to paint the straps.
10. You might have a bit of an overlap on the sides. Carefully cut away the excess.
11. I've decided to add a chain shoulder strap. Take a thin strip of leather. Add or make an eye ring for each edge. Attach the chain catching it inside of a loop on one side and threading it through the eye ring on the opposite side.
12. This will allow the chain to be used as a shoulder bag or as a handbag. And finally, I glued a bead cap over the little lump in the front of the bag.
 
Using the same techniques as above, here is the handbag Helena is holding in the opening photo.
Before and after. I covered it in black leather then added a "label" cut from self adhesive Mylar (taken from my car insurance bumper sticker) and a leather tassel. In this case, I wound thin leather around the straps. There was the problem of seeing the blue on the inside. So I added a bit of leather to the inside of the bag and touched up with a bit of black paint.
 
One last thing.....yes, you can redo those funky, little bubblegum pink boots that go with nothing in your doll's wardrobe!
And so here are those wonderful "boots." I think the idea here was a shoe with leg-warmers.
1. Because the foot is open, you will need to add a bit of cardboard to create a structure for the foot.
2. You don't have to do the next steps, but I wanted a different toe. I used air dry clay to create a new shape around the bottom of this boot.
3. Allow to dry.

 4. Again, I used a few scraps of leather. Old gloves are a good source of leather if you don't have other resources. I first, covered the top to toe of the boot.
5. Barbie boots have a slit down the back, so with a rectangle cut down to the scale of the boot, I begin by tucking in one edge to the underside of the boot. Apply glue to the body of the boot, then stretch the leather (or vinyl of non-woven material) around the boot, then tuck the other end inside of the boot.
6. I stopped to paint the heel.
7. Since there is a seam where the two pieces of material meet, I decided to add a little strap. This wraps around the base of the boot and through an eye ring.
8. Cut another piece for the sole and glue in place. I touch up any areas of the original pink (including the top edge of the boot) with a bit of paint.

Oh Joan is so much happier with her "new" cream colored leather boots!!!!

 
All images and text property of Fashion Doll Stylist. 2017. Please do not reproduce without prior permission. Thank you.
 
Follow us on Twitter: @FashDollStylist
Like us on Facebook: @FashDollStylist
We're also on Pinterest: @ FashDollStylist
Come have some fun and show off your stuff on Instagram: @fashiondollstylist
 

Thứ Ba, 15 tháng 11, 2016

Can You Ear Me Now

I am probably the only person you know who doesn't have pierced ears. As such, I'm not much of an "earring" person which is why you rarely see the girls wearing them. But after numerous complaints--especially from those FR dolls who arrived with their own pair--I have finally given in with this post! Mind you, I really don't need to do a tutorial. Earrings are easy enough to make and at the very least, you can simply pick up an existing pair and be done with it. This post serves, primarily, as a source of ideas in the context of current trends.

Trends??!! Yes, there are trends in the jewelry business that are defined annually. They may or may not have anything to do with the clothing industry. But according to Vogue.com, the hottest look is the "statement" earring. Simply stated, those are super sized earrings. Sometimes they drop as far down as the shoulders. This is good news for the dolls because it means we don't have to worry about scale!


Materials
You don't need much to get started: 1) Eye rings 2) Flat nose stems to create end beads, 3) Stems with eye rings. You can create your own posts with them although the wire is quite thin. You might consider making your own using 20-22 gauge nickel free wire. 4) Some craft stores or shops specializing in jewelry making supplies have ready made posts. All you need do is to hang whatever bead or design from the small loop beneath the bead and you're good to go. 5-6) You'll need standard and round nose jewelry pliers. 7) No matter what you use as a post, eye rings are used in between the post and whatever you suspend. It's what creates the articulation of the earring. 8) And if you want to create a drop earring using beads, here's the diagram of what it needed: An eye ring is needed to join the top and the bottom of the snowflake. The top attaches it to the post, the bottom to the rest of the earring. A stem is bent into an eye at the bottom. The bead slides on and this stem is rounded at the top to attach to the eye ring at the bottom of the snow flack. Another eye ring joins the stem to a tear drop. If you have no tear drop beads, then thread an ordinary bead onto the flat nose stem and bend it into a eye at the top.


Bejeweled
Using this method, you can create bejeweled teardrops like the ones worn here by Waris and Claudia.

Nichelle and Katoucha are wearing earrings from ready made jewelry I took apart. To reproduce the look without these specific beads, you could make them from regular beads and flat nose stems. After finishing 5-6, suspend them from a single eye ring and attach to a post.

I had fun at my favorite bead store. I forced myself away from the usually silver and gold and dared to pick up some colorful enamel geometric shapes. What's interesting here is that the earrings have similar shapes but are not carbon copies.

Each element has an eye ring and is suspended from a single piece of chain. The orange arrows point out where eye rings attach to the chain. At the very end, the longest piece, the end of the chain and the post all share a single eye ring. You notice that when Aria wears them, they fall at different lengths.


Shootin' Hoops
Super sized hoops are all the rage night now. Making them is pretty easy. You could buy chain and cut them apart or you could make them.

1) This is 18 gauge wire that I have wrapped around a small bottle cap to get a perfect circle.
2) The wire is cut so that there is an overlap. Wrap one end around the top of the round nose pliers. Bend the other end so that it completes the circle of the hoop.
3) Here's the completed hoop. All that's needed is an ear post. I made this one myself.
4) I decided to add an eye ring in between the hoop and the post so that the earring would dangle more freely.


Tassels
Another popular trend, as seen on catwalks. Sometimes you can find tiny tassels, but if you can't, here's how to make them.

1) I used embroidery thread. Make about 3-4 loops about one inch wide.
2) Take the eye ring stem and slide through the middle of your looped thread.
3) Close the loop so that it is snug.
4) Clip the thread at each end.
5) Fold this in half.
6) Take another small bit of wire and wrap around the thread about 1/8 inch (3mm) from the top. Instead of using wire, you can also use a bead cone to finish the top.
7) Once finished, clip the bottom of your tassel so that the ends are even.
8) There is still a bit of the wire stem extending from the center of our tassel.
9) Bend this back towards the tassel, forming a loop. Add a eye ring and attach to a post.

Have fun with this look.

Karen wears tassel earrings that I have combined with chain. In this case, I bought a bit of chain that had a number of elements I knew I could use. For these earrings I only needed the part of the chain you see outlined by the orange box.
I attached my tassels to the chain using eye rings. The arrows point to where they are cached to the chain. Note that when laid flat, my chain is asymmetrical. This is because I wanted the earrings to fall at two different lengths.

Chain Gang
Chain is also big and very easy to translate into doll jewelry. The top and bottom right hand photos only needed eye rings that attach to posts. But Giselle (lower left bottom) is wearing an earring comprised of an eye ring strung with three lengths of chain.


Slipped Disks
This is a runway look I decided to make. Sometimes we can't find the beads we want. I used oven back clay to make my own here. Just be aware that you cannot make them too fine or they will break.

For these disks, my clay is only the size of a small pea. I used a straight pin to pierce them. You can leave it in as you back to ensure the holes won't close.

I left these au natural, but you can paint patterns on them for truly original designs.

Remember that chain I used earlier for the tassel earrings. Here, I've removed the large leaves. All by themselves, they are gorgeous.

Of course there are plenty of stamped metal pieces to create wonderful earrings.


Any other time, these would be considered out of scale. But in the current season, anything goes. These were made from a pair of vintage earrings.


You can give dolly a single earring or....the newest way to wear them--mismatched!


But at the end of the day, there's nothing like the classics. My girls were still thrilled with their "diamond" studs. If you buy the store bought variety, look for 3 mm stones which are perfectly to scale. On the right...I created "large" diamond studs using jeweled beads and a 5/8" straight pin.

Let me show you using pearls.
I add a bit of clear drying glue to the end of the pin and slide my pearl to the edge. Wipe away the excess and allow to dry. You can also find dressmaker's straight pins with the beads already glued in place.


Follow us on Twitter: @FashDollStylist
Like us on Facebook: Facebook.com/FashDollStylist
We're also on Pinterest: Pinterest.com/FashDollStylist
Come join us on Instagram and show off our stuff: Instagram.com/fashiondollstylist


- Posted using BlogPress from my iPhone

Thứ Tư, 3 tháng 8, 2016

WATCH Out!

Just as it appeared that wristwatches had gone out of style, Apple launched the ultimate accessory to compliment its iPhone...the iWatch, thus introducing new generation to this timepiece. Unlike Rolex or Cartier tank watches, these new watches do way more than tell time. They alert the wearer to incoming calls, email, social media alerts AND they've ushered in a new, more contemporary set of aesthetics making them a must-have fashion accessory for my divas!

The new fashion accessory: iWatches,
fitness trackers and smartwatches.

Angelina perfectly happy with her
modified Ken doll watch until she
discovered the smartwatch!
There are already a few watches in the house. In my effort to make the ones that came with my Ken dolls more realistic, I glued rhinestones or watch faces to them or simply painted the entire watch with silver nail laquer! Still this was not enough. So with wire and clay in hand, I was determined to give my darlings something their doll mom doesn't have....a smart watch!

Getting there was anything but straight forward! Making a watch band was simple, however creating a suitable watch was a challenge given the miniscule scale of the doll's wrist. On the other hand, the fact that most digital devices are black and sleek until you "wake" them up means it is not necessary to add analog references, unless of course, you just want to. Though the girls were pleading for iWatches, I decided to start out by making a classic watch first. In arriving at a simple and effective "watchmaking" method, I explored using a few different elements.
Mini Brad Base 
Think of watchbands as tiny belts. You have a band slightly longer than the wrist measurement, which is held in place with a buckle of sorts. Simple. The challenge is making the actual watch.
1. I started out using mini brads (mini attaches parisiennes." Poke a hole through your watch band and feed it through.
2. Spread the wings on the underside. The one issue is that the wire wings will have to be bent to conform to the curvature of the doll's wrist, thus adding stiffness.
3. I found a watch face on the internet and sized it down to 3/16" (6mm) in my photo editor before printing it out. Cut then glue to the brad. Brush with a layer of clear nail lacquer.
4. I made a second version following the first three steps. Glue onto a slightly larger strip of leather that fits around the doll's wrist. I used very thin Velcro to close it. But be warned...the end result of was quite thick. Though I love the look I felt it best to use only very thin leather for this accessory.
 Still, I am very happy with this classic analog watch and so are my dolls.
 
Grommet Watch Face
Next, I decided to try grommets to create my watch. 

For this version you will need a metal eyelet (otherwise known as grommet) along with an eyelet setting tool, the material you intend to use for the watch band, a bit of oven bake clay and some clear nail polish. The strip of leather you cut for the cuff or band needs to be, at the very least, slightly larger than the width of the eyelet.
1. Using the eyelet setting tool, first punch a hole in your "wristband." Push the eyelet through the hole and crimp.
2. Next, roll a small bit of oven bake clay into a ball the size of the eyelet and push through the hole.
3. Using a toothpick, smooth the surface of the clay.
4. Clear the clay away from the ridge of the eyelet. and bake for about 15-20 minutes. When dry, you can sand to further make the surface smooth, if necessary.
5. Paint on a dab of clear nail polish.
There are several ways you can finish this. I tried painting on a watch face but was not happy. If you can find tiny stickers this would be ideal. If not you can create a good look with a tiny bit of very thin wire. Cut and bend into a simple shape and press in the clay BEFORE you bake it. When hardened, paint over the face with two layers of clear nail varnish.
Note: should you decide to add watch hands after you have baked the clay, you should brush on a layer of nail varnish. While it is sticky, carefully lay the hands onto the face. When dry, brush on another layer of varnish.

Otherwise, for a "digital device" use black clay or paint the cabochon black and leave blank. After all, most devices are blank until awakened!

Circular Wire Base
After making quite a number of my time pieces (to many of my dolls' delight), I figured out the easiest quickest method was this wire and clay base.

1. First, make your watch. Begin by wrapping wire (about 20 gauge) two complete turns around a narrow source (knitting or crochet needle or even the nose of jewelry pliers). You can also make other shapes like squares, but circles are easier!
2. Roll a small bit of clay the same size as the wire shape you just created. Set aside.
3. Cut a strip of materials--in this case leather--for your watch band. Slide this strip in between the loops of the wire shape.
4. Place the clay ball on top and press in.
5. Using a toothpick, smooth over the top while exposing the metal wire around the sides.
6. Since I'm making an analog watch, I download a watch face and resized it to fit the shape. in this case, the watch face is 3/16 inch or 6mm. Cut out carefully.
7. Apply glue to the backside of the watch face and carefully, position onto the top of the watch.
8. Apply clear nail polish to the watch face (to give the illusion of a crystal).
9. Carefully paint the sides with silver paint or nail lacquer.

Chain Bracelet Watch
 
What I discovered in all of this is that if you "entrap" almost any material with the clay and bake, it will hold its shape without breaking when hard. (What you don't want to do is to glue a watch onto a band. It will not stick for long!) With that in mind, I made this chain watch.
 
It is simply a bit of chain with an "S" link on one side and a pea-sized ball of oven bake clay in the middle with a watch face glued on.
For my "digital" version, I used two small lengths of wire, twisted and shaped into a bracelet fitted to the wrist of the doll. I pressed in a small ball of black clay, which after baking, is given a splash of black nail varnish.
 
Dolly Hermes iWatch
You can also wrap your watchband with the clay and bake!
 
These watches, made in two sizes to accommodate both the male and female dolls, were designed with the "Hermes iWatch" in mind. The man's watch on the left is a square of clay pressed around the leather band. I shaped it to have beveled edges. After baking it, use an emery board to get a really smooth effect. Cut your band so that it wraps twice around the hand. Further down, I show you how I finished these watch bands. The female version on the right employs the circular wire base I illustrated above. When finished, add two layers of black nail lacquer for a high gloss shine.
There is also a double wrap band on the market. Here, I've cut it using a metallic leather. If you really want something on the watch face, you can paint on a few lines or dots or even use auto-adhesive stickers to create the illusion of "digital."
This watch is a male version of the turquoise blue cuff we made earlier in the post. There is a reptile larger cuff, over which I've glued on a smaller band. That band has a wire circular base, encased with clay which has been leveled. When dry, press on your sticker. If you can find stickers with watch faces, all the better!!!!
 
Finishing Touches
 
 One of the sticklers of this project was figuring out how the watch will stay on the doll's arm. Again, think of the watch band as a tiny belt complete with buckle. For the top two watch bands above, I used a double wire link. The strap with be threaded through both wire links, then threaded back through the top (or furthest) link. On the bottom, the "S" link that you've fashioned from 20 gauge wire, simply slips though the last link of the chain.
Again, think of the strap as a tiny belt. That includes creating a classic buckle with a prong in the middle! For more detailed instructions on creating belt buckle, click HERE.
 
The Fitness Tracker
And then there are the FitBit trackers that seemingly everyone is wearing. This is super simple.
1. I started off with a small rubber washer (you find in the hardware section of your store) and a small round of black clay.
2. Form the clay so that it encircles the ring.
3. Press into the shape you want. Then using a dowel or round pencil, smooth the surface and bake for 15-20 minutes on a low setting.
4. When hard, paint only the surface of the hardened clay.
5. Again, you can leave as is (the device remains black when "asleep") or you can make a few tiny marks to indicate the exercise tracker is reporting! My dolls don't move about all that much throughout the day, so their devices will be remaining black during my waking hours!!!


All images and text property of Fashion Doll Stylist. 2016. Please do not reproduce without first asking permission. Thank you.
 
 
Follow us on Twitter: @FashDollStylist
Like us on Facebook: @FashDollStylist
We're also on Pinterest: @FashDollStylist
Come show us your stuff on Instagram: @Fashiondollstylist